Thursday, March 2


Saturday, July 5
Some Photos
I just wanted to share this with you all. There are some times when a virtual world can be beautiful.


Sunday, June 29
Wani Update: Build Mode?
Hello all, I have been a little busy with school lately, and have not been able to clock much time in my Wani project, but I have made a few changes to the way the tower mode plays, as well as tinkered with possibly creating some kind of build mode instead of a survival mode.


As you can see, the lava is a lot higher in the second screen shot than in the first. Instead of the lava burning the bottom row as I had primarily designed it, the whole thing rises up. I think that for the next levels of the tower mode I will do one or two more inside the volcano, and then some going up the mountain side, and finally a few going into the clouds. Who knows but you might reach the space station in the end?
Anyways, I also put falling crates in the background to give it some character. I don't know how much I really like it, it can be a little distracting, and I actually jumped out of the way of a couple background crates on accident when I first put them in. But after playing with it and tweaking the boundaries, I think it will work and add to the game. I don't want to put anything in that doesn't add to the game in a good way, and I want a clean and simple experience, so I guess finding the balance here is my struggle.


The next thing, and a possible major game changer would be to switch out the survival mode for a building mode in which you have the crates fall in a particular order which is defined in either a ghost brick type system(shown in the pictures above) or an outline type system. I am toying with the idea of implementing the third dimension of movement in this game mode, which would definitely add to the 3D feel. However, after testing many different camera angles, I have come to the conclusion that the camera would have to move to a good viewing angle dynamically.
Furthermore, this game was originally a 2D game, and I still want it to have that feel. I am afraid that if I attempt to give the player more range of motion, and the game begins to play like a 3D game, the simplicity of the controls (only two buttons) will become a limiting factor to gameplay.
So I am kind of at a crossroads here; the survival mode seems to be too boring, while the building mode seems to be out of the context of the game. I am going to have to improve one of them, I just can't decide which...
Well, yeah, that's about it for now, except to say that I did some internal organization of the file structure to make it easier for myself to get around in the project now that it has grown so much. Oh, and I have been thinking about recording a jam session or two with my sister for more music; one song playing over and over is kind of driving me insane... Aaaannnnnd that's about it folks, until next the time that is.
As you can see, the lava is a lot higher in the second screen shot than in the first. Instead of the lava burning the bottom row as I had primarily designed it, the whole thing rises up. I think that for the next levels of the tower mode I will do one or two more inside the volcano, and then some going up the mountain side, and finally a few going into the clouds. Who knows but you might reach the space station in the end?
Anyways, I also put falling crates in the background to give it some character. I don't know how much I really like it, it can be a little distracting, and I actually jumped out of the way of a couple background crates on accident when I first put them in. But after playing with it and tweaking the boundaries, I think it will work and add to the game. I don't want to put anything in that doesn't add to the game in a good way, and I want a clean and simple experience, so I guess finding the balance here is my struggle.
The next thing, and a possible major game changer would be to switch out the survival mode for a building mode in which you have the crates fall in a particular order which is defined in either a ghost brick type system(shown in the pictures above) or an outline type system. I am toying with the idea of implementing the third dimension of movement in this game mode, which would definitely add to the 3D feel. However, after testing many different camera angles, I have come to the conclusion that the camera would have to move to a good viewing angle dynamically.
Furthermore, this game was originally a 2D game, and I still want it to have that feel. I am afraid that if I attempt to give the player more range of motion, and the game begins to play like a 3D game, the simplicity of the controls (only two buttons) will become a limiting factor to gameplay.
So I am kind of at a crossroads here; the survival mode seems to be too boring, while the building mode seems to be out of the context of the game. I am going to have to improve one of them, I just can't decide which...
Well, yeah, that's about it for now, except to say that I did some internal organization of the file structure to make it easier for myself to get around in the project now that it has grown so much. Oh, and I have been thinking about recording a jam session or two with my sister for more music; one song playing over and over is kind of driving me insane... Aaaannnnnd that's about it folks, until next the time that is.
MXR Dyna Comp

Anyways, it's breakfast time, so I will have to be saying 'chao'.
Tuesday, May 20
Wani Update: NGUI

So I thought I'd type up a quick update on what I have been doing this week. A year or two ago I played around with the free version of NGUI, which is a tool for creating the User Interface, but I didn't really understand it. Yesterday, while moping around the Unity asset store and wishing I had more money, I ran across NGUI again, and recalled my slight acquaintance with it. On the asset store it sells for a hundred bucks, but I remembered that T.E. had a free version on their site, so I ambled over there and picked it up.
It was great timing, because I had just been trying to set up a UI for Wani, and sort of failing too. Most of my games never get to the UI design stage because the only reason I was building them was to learn an aspect of Unity, and had no real intentions of finishing them. The saying goes that you shouldn't try to reinvent the wheel, but I think I do a lot of that just to try and understand the way the wheel is put together so to speak. But for Wani, my goal is to get a game out there that is playable, using only the aspects of Unity that I know and can slap down easily. Most of the textures were free on the asset store, and as far as will go, the scenery is composed of basic shapes, which means less time spent in Blender and the Gimp, and more time spent actually putting the pieces together.
In just two days of working with NGUI, I got the basic UI put together and working well for what I need; providing player control for settings, easy navigation, and the heads-up display for better gameplay. If I generate any revenue, I'll definitely buy the full version of NGUI as well as a good sound engine. As soon as I get a fully working build put together, I'll update the page on Gamejolt so ya'll can play the latest build.
Until next time folks, this here is bye bye.
-Good E. Venson
Saturday, May 10
Wani: Valkin Up

This level is, as you can see, staged inside an active volcano. The level is one of those belonging to the climbing game mode which I mentioned in an earlier post. I think, however, that I will stick to five crates wide, and just increase the speed at which the lava burns that bottom row, thereby forcing the player to confine him/herself to less space as the game progresses.
Something that has been bothering me is that as I continue adding something, then testing it, then adding something else, then testing that, et cetera, et cetera, my skill in the game increases, and with that, my boredness with the rate of play as well. At this point, I am having difficulty not ramping up the play speed and difficulty to something nobody but Sam and I could get through. This is something a lot of developers go through, and I have been really convinced of the value of testers.
Sunday, May 4
Wani Update

Warehouse Ninja is coming along nicely. Basic game logic and ninja/crate interaction is worked out, and I am now moving on to the objective side. I have three objective modes planned: The classic Flag Tag mode where the goal is to reach a flag, and the score based on how few crates it took to do it. Next, I will have a survival mode scored by how many crates you can survive before being trapped. Third and finally, there is the climbing mode which is scored by how high you can climb in a narrow space. This will come in three difficulties; four, three and two crates wide.
Wani supports not only 2D horizontal and vertical movement like the original, but also movement in the Z-axis, which in Unity is forwards and backwards. The only problem I have with this is that you can't tell what blocks make up the back crates if there are crates in front of them. So while movement in all directions is fully supported, until I come up with a solution, I do not plan on releasing levels with three dimensional movement.
The band is working on learning the music, so we will have a soundtrack soon. As far as the sound effects go, I have only barely thought about it... I think with a soundtrack with real instruments, the synthetic "boing" and "crunch" sounds used in the original aren't quite right. But I won't really know till I get the game to that point and can try different things, so I'll cross that bridge later.
Well, I guess that's all for now, post any comments or ideas in the comments below, and maybe you'll see some of them in a later release. Links to the game and the original Neenja Inna Wear-Hauz can be found in my other post.
Until later folks, C'ya round the Universe.
-Good.Enough Venson
Thursday, May 1
Warehouse Ninja
http://gamejolt.com/games/arcade/warehouse-ninja/26045/
This is a Neenja Inna Wear-Hauz remake I am working on. I will post the link to the original in a comment.
I am building this as a member of Neo Generation Games, which also created the original.
Thursday, July 21
Arduserve 01's program vids
Ok, so I have found some time to put up a couple videos in which I show my two main test programs. If you go to YouTube to watch the clips, there is a bit more information about how the program actually works.
The first program is my latest try, and after you watch the video I will give you the code. Here it is:
And here is the code:
#include [Servo.h]
Servo Tilt; Servo Turn;
int pos = 100, GKLpos = 0, GKL = 0, smthns = 10;
int thresh = 75, allwnc = 10, drkst;
void setup()
{
Tilt.attach(9); Turn.attach(8); pinMode(4, OUTPUT);
Tilt.write(180); Turn.write(pos); drkst = analogRead(0);
}
void loop()
{
int AR_0;
drkst = analogRead(0);
digitalWrite(4, HIGH);
// Right / Left
for(pos = 150; pos > 0 + smthns; pos = pos - smthns)
{
Turn.write(pos);
delay(150);
AR_0 = analogRead(0);
if(AR_0 > GKL)
{
GKLpos = pos;
GKL = AR_0;
}
}
Turn.write(GKLpos);
delay(50);
GKL = 0;
GKLpos = 180;
// Up / Down
for(pos = 180; pos > 10 + smthns; pos = pos - (smthns*2))
{
Tilt.write(pos);
delay(150);
AR_0 = analogRead(0);
if(AR_0 > GKL)
{
GKLpos = pos;
GKL = AR_0;
}
}
Tilt.write(GKLpos);
GKL = 0;
GKLpos = 180;
delay(1000);
AR_0 = analogRead(0);
if(AR_0 > drkst + thresh + allwnc)
{
while(analogRead(0) > AR_0 - allwnc);
}
else delay(2000);
}
Here is the video of the program I did before that one, you will notice that once it loses the light, it takes a while to find it again, but if the light sensor is kept in the rotational axis, the can robot can find it again much quicker than in the previous program.
And here is the code for that program:
#include [Servo.h]
Servo Tilt;
Servo Turn;
int thresh1 = 750,
pos = 0, smthns = 3,
pos2 = 180;
int cont = 0, M;
int ftx = 1;
void setup()
{
Tilt.attach(9);
Turn.attach(8);
pinMode(4, OUTPUT);
Serial.begin(9600);
pos = 0;
Tilt.write(pos2);
Turn.write(pos);
}
int forctr = 0;
void loop()
{
//Find the x axis.
for(cont = 0; cont < 1; cont++){
digitalWrite(4, HIGH);
for (M = 180; pos < M - smthns;)//turn left
{
if (analogRead(0) < thresh1)
{
pos = pos + smthns;
Turn.write(pos);
delay(smthns * 10);
}
else
{
M = pos + 20;
while(analogRead(0) > thresh1)
{
analogWrite(A2, 200);
delay(500);
analogWrite(A2, 20);
delay(200);
}
}
}
delay(100);
for (M = 15; pos > M + smthns;)//turn right
{
if (analogRead(0) < thresh1)
{
pos = pos - smthns;
Turn.write(pos);
delay(smthns * 10);
}
else
{
M = pos - 20;
cont = cont - 1;
while(analogRead(0) > thresh1)
{
analogWrite(A2, 200);
delay(500);
analogWrite(A2, 20);
delay(200);
}
}
}delay(500);}
//find y.
if (pos2 > 10 + 40)
{
pos2 -= 40;
Tilt.write(pos2);
}
else{pos2 = 180; Tilt.write(pos);}
}
P.S. I recognize that by posting my code to the public, I have given you the permission to use and modify to any extent the said code. But, this code may not be sold without permission from me, and I would appreciate it if you would give me credit if you do use this code. Thank you!.
The first program is my latest try, and after you watch the video I will give you the code. Here it is:
And here is the code:
#include [Servo.h]
Servo Tilt; Servo Turn;
int pos = 100, GKLpos = 0, GKL = 0, smthns = 10;
int thresh = 75, allwnc = 10, drkst;
void setup()
{
Tilt.attach(9); Turn.attach(8); pinMode(4, OUTPUT);
Tilt.write(180); Turn.write(pos); drkst = analogRead(0);
}
void loop()
{
int AR_0;
drkst = analogRead(0);
digitalWrite(4, HIGH);
// Right / Left
for(pos = 150; pos > 0 + smthns; pos = pos - smthns)
{
Turn.write(pos);
delay(150);
AR_0 = analogRead(0);
if(AR_0 > GKL)
{
GKLpos = pos;
GKL = AR_0;
}
}
Turn.write(GKLpos);
delay(50);
GKL = 0;
GKLpos = 180;
// Up / Down
for(pos = 180; pos > 10 + smthns; pos = pos - (smthns*2))
{
Tilt.write(pos);
delay(150);
AR_0 = analogRead(0);
if(AR_0 > GKL)
{
GKLpos = pos;
GKL = AR_0;
}
}
Tilt.write(GKLpos);
GKL = 0;
GKLpos = 180;
delay(1000);
AR_0 = analogRead(0);
if(AR_0 > drkst + thresh + allwnc)
{
while(analogRead(0) > AR_0 - allwnc);
}
else delay(2000);
}
Here is the video of the program I did before that one, you will notice that once it loses the light, it takes a while to find it again, but if the light sensor is kept in the rotational axis, the can robot can find it again much quicker than in the previous program.
And here is the code for that program:
#include [Servo.h]
Servo Tilt;
Servo Turn;
int thresh1 = 750,
pos = 0, smthns = 3,
pos2 = 180;
int cont = 0, M;
int ftx = 1;
void setup()
{
Tilt.attach(9);
Turn.attach(8);
pinMode(4, OUTPUT);
Serial.begin(9600);
pos = 0;
Tilt.write(pos2);
Turn.write(pos);
}
int forctr = 0;
void loop()
{
//Find the x axis.
for(cont = 0; cont < 1; cont++){
digitalWrite(4, HIGH);
for (M = 180; pos < M - smthns;)//turn left
{
if (analogRead(0) < thresh1)
{
pos = pos + smthns;
Turn.write(pos);
delay(smthns * 10);
}
else
{
M = pos + 20;
while(analogRead(0) > thresh1)
{
analogWrite(A2, 200);
delay(500);
analogWrite(A2, 20);
delay(200);
}
}
}
delay(100);
for (M = 15; pos > M + smthns;)//turn right
{
if (analogRead(0) < thresh1)
{
pos = pos - smthns;
Turn.write(pos);
delay(smthns * 10);
}
else
{
M = pos - 20;
cont = cont - 1;
while(analogRead(0) > thresh1)
{
analogWrite(A2, 200);
delay(500);
analogWrite(A2, 20);
delay(200);
}
}
}delay(500);}
//find y.
if (pos2 > 10 + 40)
{
pos2 -= 40;
Tilt.write(pos2);
}
else{pos2 = 180; Tilt.write(pos);}
}
P.S. I recognize that by posting my code to the public, I have given you the permission to use and modify to any extent the said code. But, this code may not be sold without permission from me, and I would appreciate it if you would give me credit if you do use this code. Thank you!.
Tuesday, July 19
Arduino powered Book light
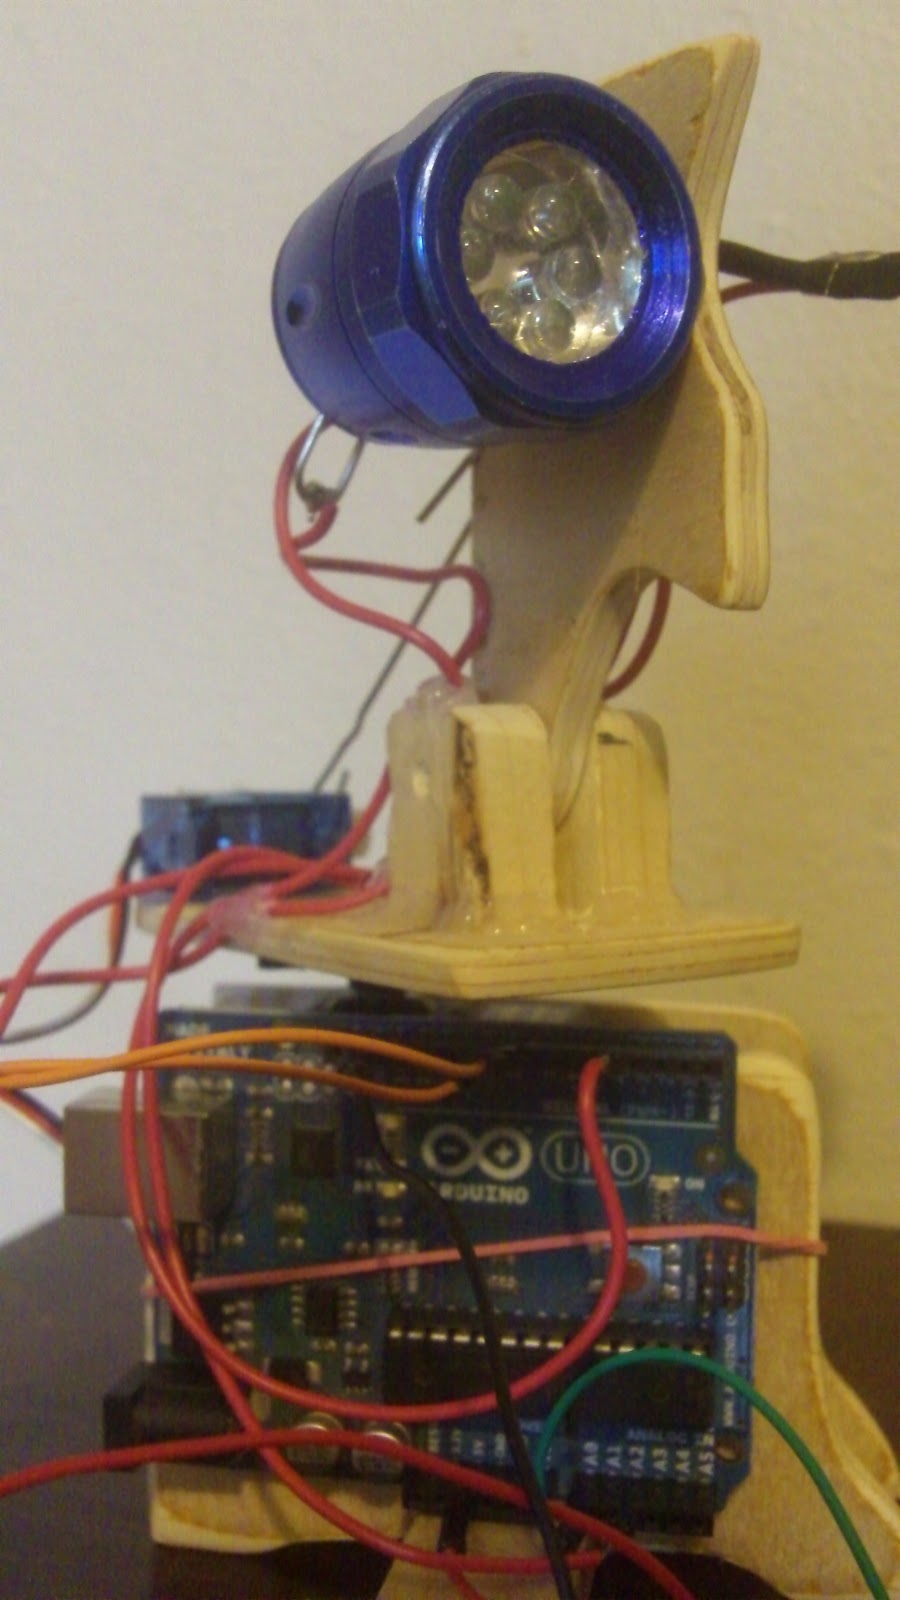
Anyway, this is my first prototype of the Arduserve bot. I cut all the wood with a jigsaw and shaped it with one of the best multipurpose tools invented; the rotozip. I used two servo motors, the little blue one came with the kit I got the Arduino in, and the other I got from a friend. I put it all together with hot glue (gotta love that stuff,) and a couple nails. This project is fairly simple and fun to build and I might post the drawings and plans for how to build it if all you readers ask for them. Until next time - good.enough -
P.S. In the meantime, please check out my story, The Legoton Press.
Monday, May 9
My inactivity
I know that I have been inactive lately, and haven't posted anything new for months, but don't call me a quitter. I have just started College, and my time is filled with school. I wish I could continue, but for the present, I am too busy to write here. sorry. :(
Friday, February 11
Surveillance 202: Update 1
Well, you know the old 80/20 rule? Once you get eighty percent of a project you don't want to complete the last twenty percent. I found that to be the case in my line follower, and have put it on the back burner... for now. Anyway, I was inspired to build a fully automated video/still camera bot. It works great and as soon as I get some pictures, I'll put them on this post. But in the meantime, I would like to share what it does. First there is a process of positioning in which you manually assign all the coordinates that the robot will use in the rest of the program. You do this by moving the motors to the desired location, and, with a press of a button, the X and Y motor values are stored in an array. When you are done storing positions, you press another button, and the robot takes off on its own. The great thing about this method is: that the program is fully customizable to different rooms or locations, that you have an unlimited amount of picture locations ( basically unlimited, ) and the robot is very easy to build.
There are definitely some things that I want to change, most importantly, I want to be able to change a certain coordinate without having to go back and re-enter all of them. There are also innumerable extras that would be fun to add, such as a sound sensor to determine the loudest part of the room, and take most of the pictures there, or maybe a portrait taking program that would use an ultrasonic sensor to locate a person and take their picture. Well I'll leave it at that until I have more time. See Ya Back!!!
I have added a function to my code. It enables you to change existing parameters and even add new ones!
I am working on pictures right now so stay tuned!
void set_a_val()
{
PlayTone(1000, 100); Wait(100);
int c;
for(c = 0; ButtonPressed(3, true) == false; ){
ClearScreen();
NumOut(32, 50, c, false);
if(ButtonPressed(1, true) == true){
c++; until(ButtonPressed(1, true) == false); }
if(ButtonPressed(2, true) == true){
c--; until(ButtonPressed(2, true) == false); }
}
if(c > L) c = L;
else if(c < 0) c = 0;
if(c > S) S = c + 1;
until(ButtonPressed(1, true) == true);
PlaceX[c] = MotorTachoCount(OUT_A); PlaceY[c] = MotorTachoCount(OUT_C);
PlayTone(500, 100); Wait(200);
PlayTone(1500, 100); Wait(100);
}
P.S. I recognize that by posting my code to the public, I have given you the permission to use and modify to any extent the said code. But, this code may not be sold without permission from me, and I would appreciate it if you would give me credit if you do use this code. Thank you!.
There are definitely some things that I want to change, most importantly, I want to be able to change a certain coordinate without having to go back and re-enter all of them. There are also innumerable extras that would be fun to add, such as a sound sensor to determine the loudest part of the room, and take most of the pictures there, or maybe a portrait taking program that would use an ultrasonic sensor to locate a person and take their picture. Well I'll leave it at that until I have more time. See Ya Back!!!
I have added a function to my code. It enables you to change existing parameters and even add new ones!
I am working on pictures right now so stay tuned!
void set_a_val()
{
PlayTone(1000, 100); Wait(100);
int c;
for(c = 0; ButtonPressed(3, true) == false; ){
ClearScreen();
NumOut(32, 50, c, false);
if(ButtonPressed(1, true) == true){
c++; until(ButtonPressed(1, true) == false); }
if(ButtonPressed(2, true) == true){
c--; until(ButtonPressed(2, true) == false); }
}
if(c > L) c = L;
else if(c < 0) c = 0;
if(c > S) S = c + 1;
until(ButtonPressed(1, true) == true);
PlaceX[c] = MotorTachoCount(OUT_A); PlaceY[c] = MotorTachoCount(OUT_C);
PlayTone(500, 100); Wait(200);
PlayTone(1500, 100); Wait(100);
}
P.S. I recognize that by posting my code to the public, I have given you the permission to use and modify to any extent the said code. But, this code may not be sold without permission from me, and I would appreciate it if you would give me credit if you do use this code. Thank you!.
Wednesday, February 9
Line follower update 03
I've gotten the program pretty much worked out. I have only a few details to be worked out, but for now at least, all building has been put on the back burner as I am now focusing entirely on my schooling about seven hours a day seven days a week. speaking of which, I am supposed to be reading right now... well any way, I am going to post the whole program for ya'all now, so be ware!!!
#define ant(a) until(Button == a) Button = ButtonPressed(3, true)
#define sound(b); PlayTone(b, 50); Wait(100);
#define Move(c,d); { int T; OnFwdEx(OUT_A, d, false); if(c > 0) until( T > c ){ T = MotorTachoCount(OUT_A);} else until( T < c ){ T = MotorTachoCount(OUT_A);} }
bool alth, Go = true, Button = false, line = true;
bool where[] = {false, false, false, false, false};
//int turndeg[] = {-300, -150, 0, 150, 300};
int width = 0, line_position = 0, LLP = 0, thresh = 25;
int m = 0;
safecall int MAP(int input, int input_ref, int output_ref)
{ return (input * output_ref) / input_ref; }
bool AlterThresh(int T, int S, int L, bool AT){
if(T > S && T < L && AT == true){ thresh = thresh + 5; AT = true; }
else{ AT = false; } return AT; }
safecall void MOTOR_CONTROL(bool FB, int speed){
if(FB == true){ int turnpct = MAP(line_position, 100, 200) - 100;
RotateMotorEx(OUT_BC, speed, 90, turnpct, true, false);}
else RotateMotorEx(OUT_BC, -speed, 90, 0, false, false);}
task DISPLAY(){ while(Go == true){
SetSensorLight(IN_3);
TextOut(0, 57, "W", true); NumOut(10, 57, width, false);
TextOut(50, 57, "T", false); NumOut(60, 57, MAP(MotorTachoCount(OUT_A), 180, 100), false);
TextOut(0, 43, "P", false); NumOut(10, 43, line_position, false);
//TextOut(50, 43, "%", false); NumOut(60, 43, turnpot, false);
TextOut(0, 0, "L", false); NumOut(10, 0, m, false);
TextOut(25, 0, "LS", false); NumOut(38, 0, Sensor(IN_3), false);
TextOut(55, 0, "TH", false); NumOut(68, 0, thresh, false);
for(int c = 0; c < 5; c++){
if (where[c] == true) TextOut(c*10, 28, "O", false);
else TextOut(c*10, 28, "X", false);
}
Wait(100);
}}
task SCAN(){
SetSensorLight(IN_3);
int T = 0, pace = 50;
alth = true;
for(m = 0; Go == true;)
{
OnFwdEx(OUT_A, pace, false);
until( T > 180 || Sensor(IN_3) < thresh ){ T = MotorTachoCount(OUT_A);}
until( T > 180 || Sensor(IN_3) > thresh ){ T = MotorTachoCount(OUT_A);}
alth = AlterThresh(T, 160, 200, alth);
Move(pace, MotorTachoCount(OUT_A) + 10);
OffEx(OUT_A, false);
Wait(100);
OnFwdEx(OUT_A, -pace, false);
until( T < 1 || Sensor(IN_3) < thresh ){T = MotorTachoCount(OUT_A);}
until( T < 1 || Sensor(IN_3) < thresh ){T = MotorTachoCount(OUT_A);}
alth = AlterThresh(T, -200, 20, alth);
OffEx(OUT_A, false);
Wait(100);
if(alth == false && m == 0){thresh = thresh + 5; m = 1;}
}
}
task DATA_LOG(){
SetSensorLight(IN_3);
int end, sta;
while(Go == true){
bool FR = true;
int c = 0, now = CurrentTick();
until(Sensor(IN_3) < thresh){
if(CurrentTick() - now > 2000 && alth == false){ FR = false; MOTOR_CONTROL(false, 25); }}
if(FR == true) MOTOR_CONTROL(true, 50);
sta = MAP(MotorTachoCount(OUT_A), 180, 100);
sound(800);
until(Sensor(IN_3) > thresh);
end = MAP(MotorTachoCount(OUT_A), 180, 100);
sound(1000);
line_position = (end + sta) / 2;
if(sta > end) width = sta - end;
else width = end - sta;
for(;c<5;c++) where[c] = false;
// 0-25, 25-35, 35-65, 65-75, 75-100
if (line_position > 0 && line_position < 26) where[0] = true;
if (line_position > 25 && line_position < 50 - (width/2)) where[1] = true;
if (line_position > 50 - (width/2) && line_position < 50 + (width/2)) where[2] = true;
if (line_position > 50 + (width/2) && line_position < 74) where[3] = true;
if (line_position > 75 && line_position < 100) where[4] = true;
}
}
task main(){
RotateMotor(OUT_A, 35, -90);
ResetTachoCount(OUT_A);
Button = ButtonPressed(3, true);
while(true)
{
start DISPLAY;
start SCAN; sound(1500);
for(int c=0;c<5;c++) where[c] = false;
start DATA_LOG; sound(1500);
Button = ButtonPressed(3, true);
ant(true); sound(500);
ant(false); sound(1000); Go = true;
}
}
#define ant(a) until(Button == a) Button = ButtonPressed(3, true)
#define sound(b); PlayTone(b, 50); Wait(100);
#define Move(c,d); { int T; OnFwdEx(OUT_A, d, false); if(c > 0) until( T > c ){ T = MotorTachoCount(OUT_A);} else until( T < c ){ T = MotorTachoCount(OUT_A);} }
bool alth, Go = true, Button = false, line = true;
bool where[] = {false, false, false, false, false};
//int turndeg[] = {-300, -150, 0, 150, 300};
int width = 0, line_position = 0, LLP = 0, thresh = 25;
int m = 0;
safecall int MAP(int input, int input_ref, int output_ref)
{ return (input * output_ref) / input_ref; }
bool AlterThresh(int T, int S, int L, bool AT){
if(T > S && T < L && AT == true){ thresh = thresh + 5; AT = true; }
else{ AT = false; } return AT; }
safecall void MOTOR_CONTROL(bool FB, int speed){
if(FB == true){ int turnpct = MAP(line_position, 100, 200) - 100;
RotateMotorEx(OUT_BC, speed, 90, turnpct, true, false);}
else RotateMotorEx(OUT_BC, -speed, 90, 0, false, false);}
task DISPLAY(){ while(Go == true){
SetSensorLight(IN_3);
TextOut(0, 57, "W", true); NumOut(10, 57, width, false);
TextOut(50, 57, "T", false); NumOut(60, 57, MAP(MotorTachoCount(OUT_A), 180, 100), false);
TextOut(0, 43, "P", false); NumOut(10, 43, line_position, false);
//TextOut(50, 43, "%", false); NumOut(60, 43, turnpot, false);
TextOut(0, 0, "L", false); NumOut(10, 0, m, false);
TextOut(25, 0, "LS", false); NumOut(38, 0, Sensor(IN_3), false);
TextOut(55, 0, "TH", false); NumOut(68, 0, thresh, false);
for(int c = 0; c < 5; c++){
if (where[c] == true) TextOut(c*10, 28, "O", false);
else TextOut(c*10, 28, "X", false);
}
Wait(100);
}}
task SCAN(){
SetSensorLight(IN_3);
int T = 0, pace = 50;
alth = true;
for(m = 0; Go == true;)
{
OnFwdEx(OUT_A, pace, false);
until( T > 180 || Sensor(IN_3) < thresh ){ T = MotorTachoCount(OUT_A);}
until( T > 180 || Sensor(IN_3) > thresh ){ T = MotorTachoCount(OUT_A);}
alth = AlterThresh(T, 160, 200, alth);
Move(pace, MotorTachoCount(OUT_A) + 10);
OffEx(OUT_A, false);
Wait(100);
OnFwdEx(OUT_A, -pace, false);
until( T < 1 || Sensor(IN_3) < thresh ){T = MotorTachoCount(OUT_A);}
until( T < 1 || Sensor(IN_3) < thresh ){T = MotorTachoCount(OUT_A);}
alth = AlterThresh(T, -200, 20, alth);
OffEx(OUT_A, false);
Wait(100);
if(alth == false && m == 0){thresh = thresh + 5; m = 1;}
}
}
task DATA_LOG(){
SetSensorLight(IN_3);
int end, sta;
while(Go == true){
bool FR = true;
int c = 0, now = CurrentTick();
until(Sensor(IN_3) < thresh){
if(CurrentTick() - now > 2000 && alth == false){ FR = false; MOTOR_CONTROL(false, 25); }}
if(FR == true) MOTOR_CONTROL(true, 50);
sta = MAP(MotorTachoCount(OUT_A), 180, 100);
sound(800);
until(Sensor(IN_3) > thresh);
end = MAP(MotorTachoCount(OUT_A), 180, 100);
sound(1000);
line_position = (end + sta) / 2;
if(sta > end) width = sta - end;
else width = end - sta;
for(;c<5;c++) where[c] = false;
// 0-25, 25-35, 35-65, 65-75, 75-100
if (line_position > 0 && line_position < 26) where[0] = true;
if (line_position > 25 && line_position < 50 - (width/2)) where[1] = true;
if (line_position > 50 - (width/2) && line_position < 50 + (width/2)) where[2] = true;
if (line_position > 50 + (width/2) && line_position < 74) where[3] = true;
if (line_position > 75 && line_position < 100) where[4] = true;
}
}
task main(){
RotateMotor(OUT_A, 35, -90);
ResetTachoCount(OUT_A);
Button = ButtonPressed(3, true);
while(true)
{
start DISPLAY;
start SCAN; sound(1500);
for(int c=0;c<5;c++) where[c] = false;
start DATA_LOG; sound(1500);
Button = ButtonPressed(3, true);
ant(true); sound(500);
ant(false); sound(1000); Go = true;
}
}
Wow! If anyone has suggestions or comments, feel free to type, I am always looking for advice! Also, be sure to check out my other blog the Legoton Press. You can get there by clicking on "view complete profile" over on the right.
P.S. I recognize that by posting my code to the public, I have given you the permission to use and modify to any extent the said code. But, this code may not be sold without permission from me, and I would appreciate it if you would give me credit if you do use this code. Thank you!.
Sunday, January 30
Line follower update 02
I have gotten far on my program, and will post a screen-shot for you now. Just a minute... Ok, here it is:

Well, that is all for now... I'd better get back to programming!
P.S. I recognize that by posting my code to the public, I have given you the permission to use, modify to any extent the said code. But, this code may not be sold without permission from me, and I would appreciate it if you would give me credit if you do use this code. Thank you!

First page out of three!
As you can see, the layout is quite messy. I have too many global variables, most of which task DISPLAY() is using. I think that I will turn DISPLAY() into a function that is called by the other two main tasks. If you will notice, the screen-shot shows only one third of the code I have written. That is too much code for a simple line follower, but as I get each part perfected, I hone it down. For example: The function MOTOR_CONTROL(), was at first a complicated task, but as I saw that I only wanted it to run after a certain part of task DATA_LOG(), I converted it into a function. This conversion enabled me to eliminate a few global variables that were used only by MOTOR_CONTROL(), substituting them for parameters.Well, that is all for now... I'd better get back to programming!
P.S. I recognize that by posting my code to the public, I have given you the permission to use, modify to any extent the said code. But, this code may not be sold without permission from me, and I would appreciate it if you would give me credit if you do use this code. Thank you!
Tuesday, January 18
Building a Line follower. Easy?
Ok, I guess that from my last post I sounded pretty much an expert on the whole line following thing... well ever since then I've been working on a follower myself, and I'll tell you what, it ain't easy. I find myself in the lower end of "the middle class of programmers" which I established in my last post. (Those who understand the basics and essentials of programming, but have not mastered the art.) I finished the robot in a few hours, but I've made, and rejected, three complex programs each of which I spent considerable time designing. I am now on my fourth, I decided to do it in NXC because I was running out of file space on my NXT when using NXT-G. So far, I haven't got quite as far as I did in NXT-G, but I had to overcome many obstacles and bugs (not being very fluent in NXC.) I will be posting updates on my robot as well as code snippets as I get them finished.
Monday, January 10
Line Following
 |
| Continuous Line Follower |
 |
| Four Light Sensors |

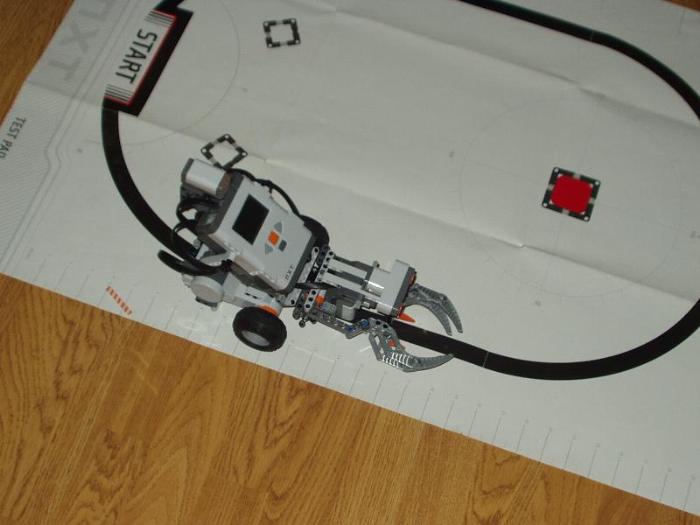
 There are many other alternatives to the methods of line following described above, one being to buy non-lego sensors for your robot such as the five sensor array below. One alternative that I have thought of is to have a light sensor mounted on an arm or boom and swing back and forth in front of the robot. The light sensor would detect the line edges and, depending on the position of the servo controlling it, the NXT could tell how hard to turn, and what direction to turn.
 The algorithm used to decide the turn would run something like this.
#define RIGHT true;
#define LEFT false;
{ // when pointed straight ahead, the rotation sensor is at zero.
int turnpct = degrees / 2;
if (degrees > 0){ direction = RIGHT; }
else if (degrees < 0){ direction = LEFT; }
RotateMotorEx(BC, 100, 90,
turnpct, true, false);
}// I have not tested this algorithm.
//I made it up as I was sitting here,
//but it is something like that which you would use.
 |
| The GreyHound |
The main advantage of such a design is:
Although a little slower than using multiple light sensors, the 'sweeping' method is much more accurate, providing the ability to get a reading on every degree that the motor controlling it is able to turn to.
For example, say that we have four different light sensors across the front of our robot similar to what we see in the third picture up. We could get four readings. We could vaguely tell how wide the line is, and generally where it is in respect to the front of the robot. Now let's say that the line our robot is trying to follow is wide enough to fit one light sensor. The robot randomly picks one of the middle sensors (we'll call it Jared.) Now on following the line, the robot tries to keep the line under the chosen sensor (Jared,) and when Jared losses the line, the two other sensors start checking for it in order to alert the NXT as to where it is. On receiving information as to the direction the line has turned, the NXT gives the appropriate information to the drive motors who respond accordingly. This sounds great, but there are two problems to this method. If the line turns too sharply, the robot loses it, and upon adjusting the turn radius, the bot follows the line in zig-zags thereby considerably reducing its speed.
If we use the sweeping method however, our results are much more promising. The light sensor (we'll continue using the name Jared for familiarities sake,) goes back and forth across the line, stopping precisely at the edges so as not to get confused with any other lines that may be in the near vicinity. Every time Jared gets to one edge of the line, he informs the NXT, who in turn, gets the motor degrees from the motor moving Jared. After receiving two such motor positions, the NXT finds the average, ( the middle of the line, ) and adjusts the turn percent accordingly. When our robot comes to a corner, it slows down so as to not overrun and get lost.
To sum it all up, the sweeping method of line following is slower going in a straight line because of the time taken to move the sensor, but because of the added locations possible for the sensor to be in, the robots precision is greatly advanced and therefore the speed and smoothness in traversing curves surpasses greatly the performance of other robots.
Saturday, January 1
4 DOF mobile robotic arm
Have you ever tried to build a big robot, so big that you'd need multiple brains and definitely multiple power sources? Well, up to now I have wanted to, but I did not have all the pieces, motors, and ways to control them.
For maybe a year I have gotten close to big because of the amount of Legos I had obtained, but I still wasn't quite there. This year for my birthday I received an Arduino and decided to use it for a second motor controller. Since the Arduino can provide five volts only, I used it to manipulate the servos controlling the pneumatic switches.

Now, this may seem great, but after putting it all together, the parts I still needed coming in the mail, I ran the quick test program I always do (to work out the last details,) and realized something important. Even though I had geared the motors down, they were not moving... the robot was just too heavy. I decided to remodel using worm gears this time to see if I could get any movement at all. Now that that is done, it is all moving smoothly, though extremely slowly.
After witnessing the extreme slowness produced by the heavy-ness of my machine, I decided to do a bit of research on NXTLog to see if anybody had gotten a large and complex robot to go very fast at all. It seems that nobody has... at least, I did not see any body getting a robot with as many motors and all in all weight as my bot to traverse with any speed to talk about. Well that is interesting, I wonder if there are any other, more powerful motors for cheap that could be adapted for use in a Lego robot.
for more pictures of my Mobile Robotic Arm, click HERE.
For maybe a year I have gotten close to big because of the amount of Legos I had obtained, but I still wasn't quite there. This year for my birthday I received an Arduino and decided to use it for a second motor controller. Since the Arduino can provide five volts only, I used it to manipulate the servos controlling the pneumatic switches.

After witnessing the extreme slowness produced by the heavy-ness of my machine, I decided to do a bit of research on NXTLog to see if anybody had gotten a large and complex robot to go very fast at all. It seems that nobody has... at least, I did not see any body getting a robot with as many motors and all in all weight as my bot to traverse with any speed to talk about. Well that is interesting, I wonder if there are any other, more powerful motors for cheap that could be adapted for use in a Lego robot.
for more pictures of my Mobile Robotic Arm, click HERE.
Thursday, December 16
Surveillance 101
 There are many different types of surveillance robots;
stationary robots-
mobile robots-
and even flying robots-


 |
| My Bot - Surveillance 101 |
I recently built my own stationary wall-mounted one to record a party we held in our home. As you can see, it doesn't look like much, but it is capable of rotation on the Z axis, and tilt on the Y axis. It is secured to a coat rack with rubber bands, and stabilized with rubber wheels. The camera, (not shown in pictures,) is just a web cam which rests on the top of the robot. Live video from the camera is passed through the usb cord into a computer which stores the data for further use. The program for Surveillance was very simple because I had only an hour to build it. It ran two loops; one controlling the tilt, and the other, the rotation.
For more pics please go HERE.
Tuesday, December 14
Oglesniper II
Ok folks, the plans for the great fire shooting machine have been found. King Armendon's mechanics have built the "tank" as it is called in the plans, and I now present it to you (quite informally.) For the details on how this was achieved, I have started writing out all the events that took place between the invasion and now, and publishing them in the Legoton Press.
 for more pics please go here.

Thursday, November 25
Follow up: Thanksgiving
This information is no longer available. To view what used to be here, please visit the Legoton Press (my other blog.)
Subscribe to:
Posts (Atom)